September 23, 2011

Extraction

Hey Folks,

Due to some technical difficulties, and the release of a certain yearly Xbox hockey game, it's been quite some time since my last post. However, in that time I finally got all my honey extracted. Here's a bit of a quick run down of how the process works.

On a fine Labour Day weekend, we headed out to the bee yard to grab whatever frames of honey were ready for extraction. Early that week I had received and assembled my 2 frame extractor and was excited to test it out. Out at the bee yard, our friend Mandy donned the bee suit to act as my assistant in removing the bees the frames before we put them into a separate box.

Mandy, looking dapper in her bee suit.

We were soon joined by our other friends, along with my smallest bee keeping assistant yet, Piper. She was super excited to see the bees and to find out where honey comes from because she absolutely loves it. I know understand why Patty Milligan loves all the school programs she does. It's so exciting to see young kids who aren't afraid of bugs.

Piper in a homemade veil.

Once all the frames we collected to headed back to my garage to start the extraction process. The first step was to use the honey punch to pierce small holes in all the cappings. I had read a few reviews online about the honey punch and it's ease of use and must say that they were all true. As apposed to the other ways of removing the cappings, ie. heated knife or scrapper, this was super quick and for the most part mess free.

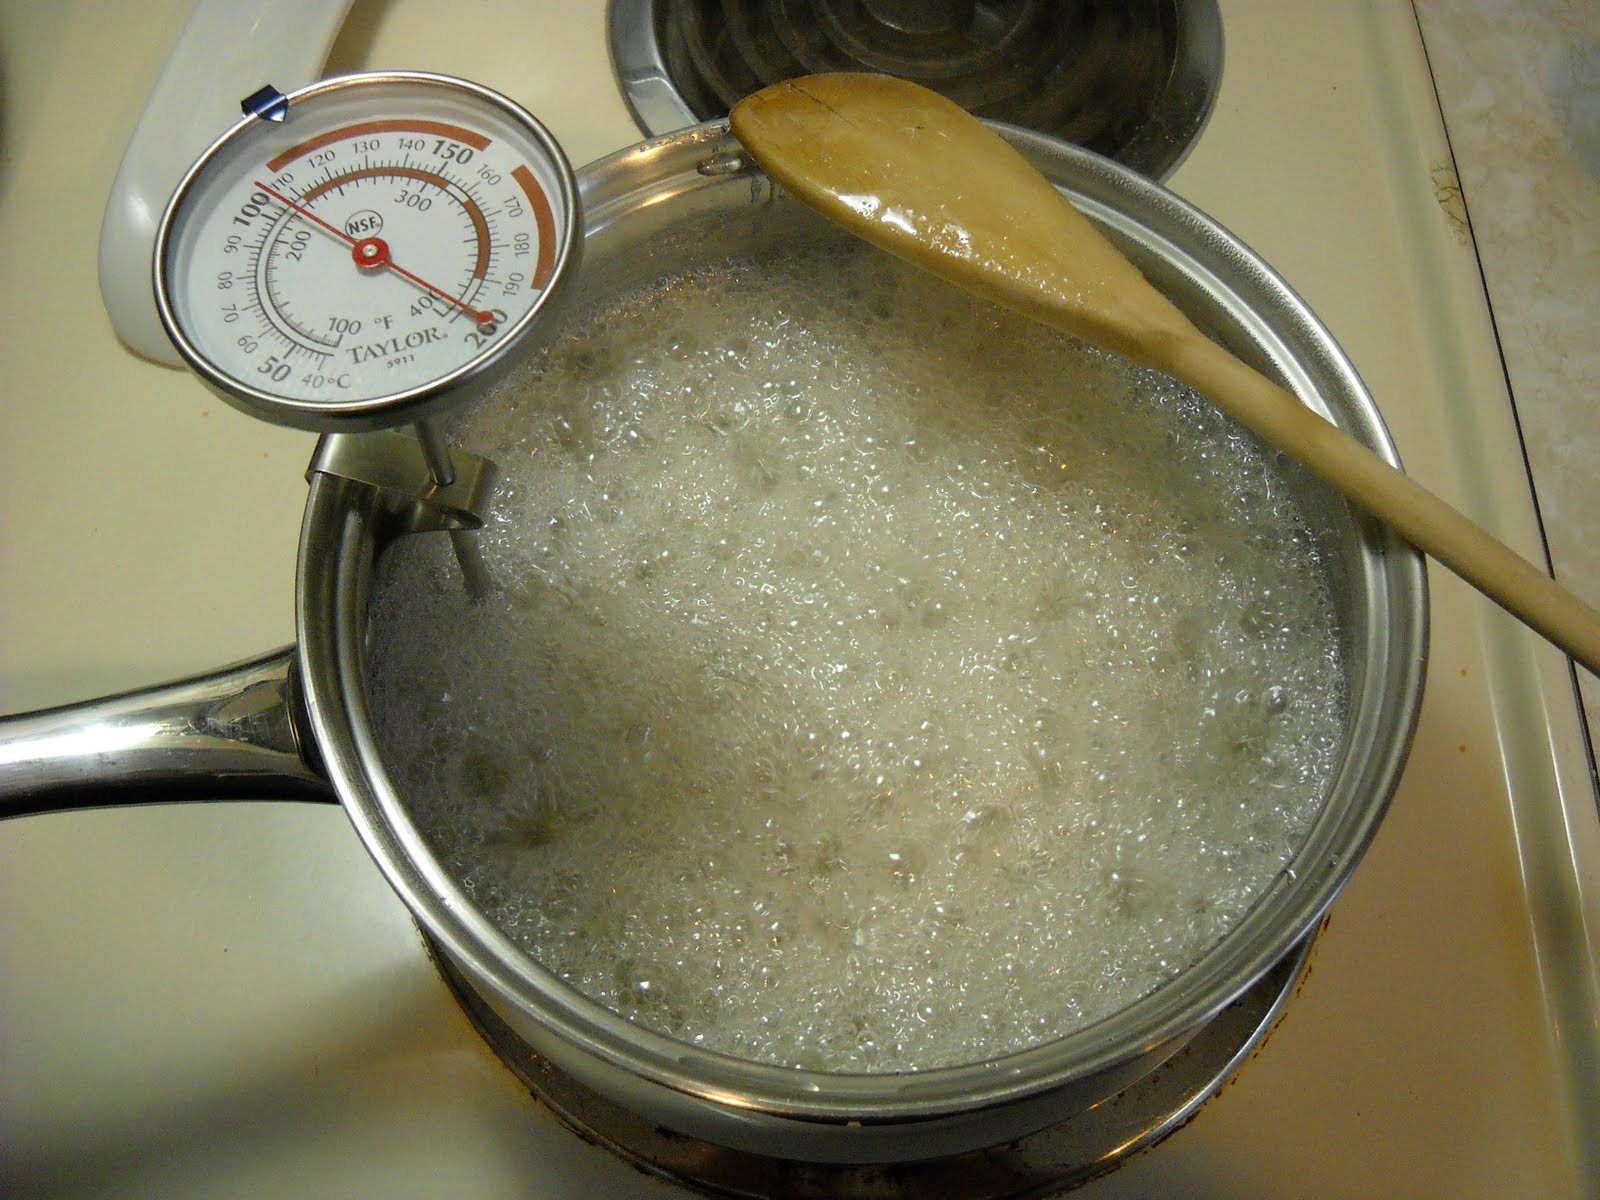
Once the cappings were thoroughly punched, I put the frames into the extractor and applied good 'ol elbow grease and this is when the problems started. After 1 good spin the gears started to skip and it wasn't possible to build up the centrifugal force needed. A few minutes of problem solving discovered a few issues, the only remedy being to order a new gearbox from the manufacture. Lucky, that 1 good spin did manage to extract about a liter of honey and after sitting in the sun for a bit we opened the honey gate and let it flow out.

Wonder how long until I want a motorized extractor.....

Arrrrr, we've struck gold Mateys!

After I received the new gearbox I extracted the rest of the frames and got around 8 liters of honey. All that from around 8 frames because there weren't as many fully capped frames as I had hoped this year. Either way, I am happy with the performance of my extractor and really look forward to putting the fully drawn comb back into the hive next year to have the bees fill it up next year.

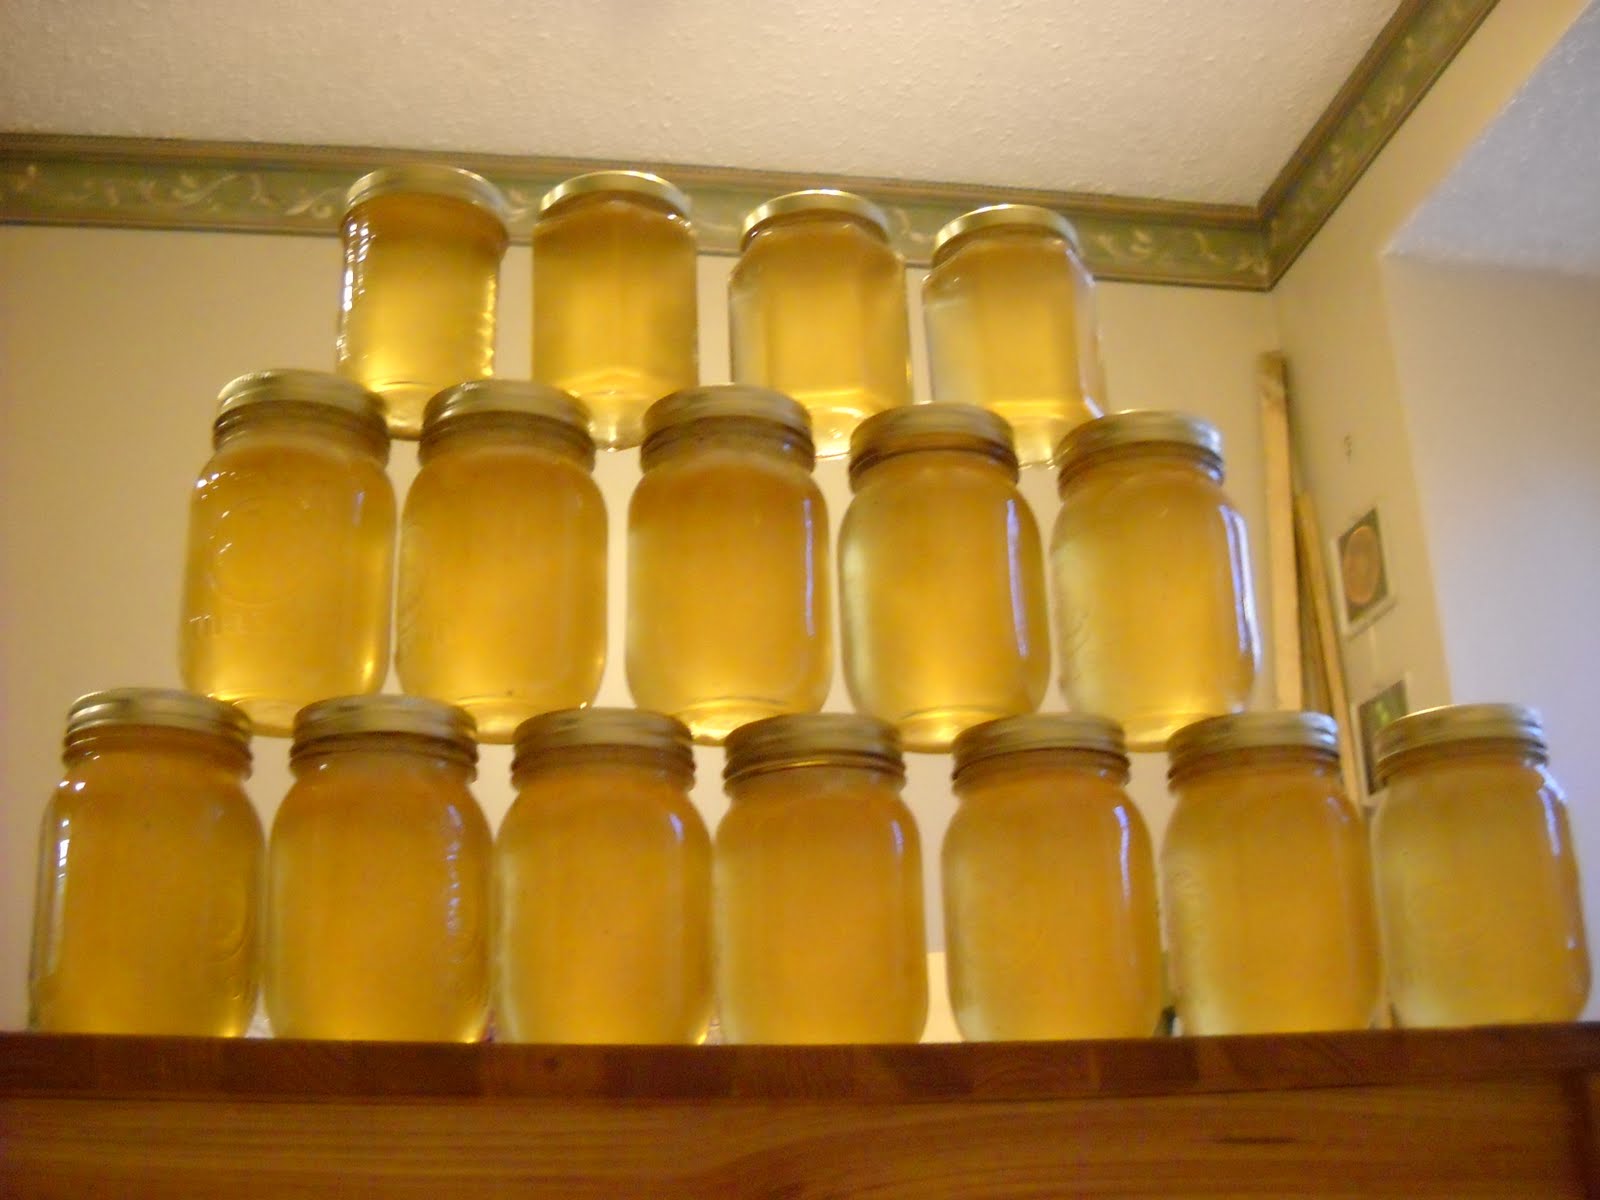
That's a lot of honey.

Thanks to all my friends who came out for my first extractor party. It will be the first of many. Also, if you still haven't gotten your name in for honey do so quickly.

August 30, 2011

Summer Vacation

Hey Everyone,

I'm back from my summer hiatus with a little bit of news. Forgive my lack of posting, but to be truly honest I don't really think posting just for the sake of posting is productive. The summer has come and gone. Yes, I've come out and said it, the days are getting shorter and the weather cooler. The bees haven't been at all pleased with how the weather has been, at least here in Edmonton. We had A LOT of rain this summer, not exactly what you'd call great nectar gathering weather. Mario's hives have done, for the most part, poorly. Although he did say he got 54, that's right count them 54!, frames of honey from a single hive. Yowzas!!

So here are a few of the things I made mental notes of during my few inspections over the summer. I've done a few things to my Langstroth this summer. First I blocked the top entrance off for 2 weeks and then I added a modified bottom board. Here is a picture of what the hive looked like a few weeks ago when my in-laws were up to collect some cut comb honey.

Quality time with the girls.....oh, and the mother-in-law.

The first thing you may or may not notice is that the bottom board I modified now places the long side of the box to the front. This serves two purposes: 1) It positions the frames in such a way that when standing behind hive the beekeeper doesn't have to reach or make any weird contortions to remove the frames. I found this absolutely wonderful. 2) The bottom entrance is now larger which allows for better airflow and less bee congestion.

Another issue I had to deal with was the top entrance. I do like the idea of having it as it provides great ventilation for the bees, however after winter it became the main entrance for the bees. This is due to the fact that all the new bees emerging from winter orientated to it because the lower entrance was blocked with debris and an entrance reducer. Even after I have cleaned out the hive and removed the reducer the bees were still using this entrance. It will come down to personal preference, but the issue you will come across with having a top entrance is that when you do inspections there will be a higher volume of bees flying around. This is due to all the foragers who are returning coming to where the entrance was. I didn't really like the extra commotion, so I simply duct taped the upper entrance closed. After a week, all the bees had re-orientated to the lower entrance and it wasn't an issue anymore.

I'm sure all of you that missed out on honey last year, or those who want more, just want me to get to the part about how much honey my bees made this year! From the looks of it, I'll have around 10 frames of honey. Some of you may think that pales in comparison to Mario's single hive 54 frames, and it does, however considering that last year I extracted 2 liters of honey from 2 frames I should have plenty to go around. I managed to find a cheap 2 frame extractor from a company out of Vancouver with free shipping and it should be arriving soon. Once it's all setup, I'll extract my frames and get it all bottled up and ready for delivery.

HONEY IS FIRST COME, FIRST SERVE!! If you would like a jar this year, please email me at newbees@telus.net. Also, I do have a single frame that I can make cut comb honey (honey still in the wax), if you would like a square of comb honey please let me know because quantities are limited. Donations are welcome :-P


My Mother-in-law holding a honey frame, minus two pieces of cut comb.

That's all for now, stay tuned for the Calgary top bar saga in the next few days. I will also be posting pictures and tales of how my adventure with the extractor go.

Until then, bee cool!

June 27, 2011

Calgary Tale; Part 2

Greetings readers,

So you've recently learned about how it easy it would be to setup at hive in the city of Calgary. I wanted to do a little bit of follow up because I can't believe how well the bees are doing down there. I was down this past weekend visiting and had the pleasure of simply lounging around on the deck watching and listening to bees come and go from the hive and various plants around the garden. Right next the deck were some Allium giganteum and the bees were all over it. It's indescribably relaxing just sitting in the sun and listening to the sporadic humming as each bee goes from flower to flower.

The other fun activity to do was to sit and watch the dozens of bees going to and fro the watering hole that has been setup on the deck near the hive. It consists of a terracotta saucer filled with specially selected geologically pertinent rocks, both my in-laws are geologists. I hope the bees realized that's petrified wood they're walking on, it is possible to spoil bees?

With my Dad having done his last inspection 2 weeks earlier I had the pleasure of having a quick look to see how things were progressing, and I must say things are going gang busters! Here is a before and after shot of the same top bar during a span of 2 weeks. My dad might have to start engineering a way to install a second hive on top of this one if they keep growing at this rate.

Before: Taken June 12th, 2011.


After: Taken June 25th, 2011

On a completely unrelated note I wanted to post this awesome picture I took of the most marvelous creature I have seen in our garden to date, not including my bees of course. I took this last week, on the 21st, when I noticed something hovering around the back fence. I couldn't quite figure out what it was because it was too small to be a bird but too large to be a bumblebee. As soon as I noticed it had landed on my Delphiniums, I ran to grab to the camera. Here's what I saw!

After a little research I found this to be a Hemaris thysbe, Hummingbird Clearwing moth. It is called that because it will hover in front of flowers to feed like a hummingbird and due to its very large size can be easily mistaken as such.

Isn't nature cool! Queue SONG!

June 23, 2011

Tales from Calgary

Hey Everyone,

As I promised a few weeks ago there was a second tale of Top bar beekeeping I had to tell. Again, I got bogged down in other things and have finally gotten around to rounding up all the pictures of my adventure.

It started in February when I went down to Red Deer to meet up with Eliese Watson. Eliese is the founder of Apiaries and Bees for Communities, A.B.C., down in Calgary. For the past couple of years she has been working non-stop to promote pollinators of all kinds but her hardest work has been growing the urban beekeeping scene in Calgary like nobody's business. I had learnt that she was planning a Co-op purchase of nucs from a local source, Bill Stagg, out of B.C. and I was thrilled at the idea of getting my hands on some locally raised bees and queens so I eagerly signed up.

During this time my father was showing quite a lot of interest in beekeeping. He grew up in the prairies on the farm so it wasn't anything unfamiliar to him. When I posed the question as to if he wanted to keep the Nuc I ordered down in Calgary in their backyard he was on it like white on rice. Due to his connections with friends that have wood working shops my Dad was able to build his entire top bar in a weekend, goes to show what having the right tools will do for you, it took Beatrice and I 2 weeks to build ours. As the pick-up date grew nearer though, my mother was growing more anxious about all the perceived issues and problems of backyard beekeeping. In the end, she would have nothing of it and I started my search for an alternative location within Calgary so that my Dad could continue on and enjoy the beekeeping experience. The help came from none other than my own Mother-in-law, she is an avid gardener and had no qualms with the bees...as long as she didn't receive too many complaints and only if my Dad did all the work.

Dad's hive, right next to the house.

The weekend of the Nuc pickup was quite the spectacle. Eliese, who had obviously been working like a bee, had around 100 people show up to pick up their bees and learn about how to hive them. Men, women and children of all ages were there in veils and bee suits, Calgary is definitely headed in the right direction. The weather however had different plans for that week. After we put the bees in the backyard it proceeded to rain and be miserable for a week. Eventually the sun broke through and my Dad was able to put the bees into the hive. Since then he and my mother-in-law have been avid beekeepers, doing their inspections and observing the hive. From all the emails and pictures they send it's quite obvious that the hive is doing very well. I am still a bit envious that I cannot have a top bar in my backyard without risking another call from my loony neighbour, but I think maybe after all our landscaping is done I might sneak one in next year and let the chips fall where they may.

Great looking comb.

Can you see the queen?

June 13, 2011

HAPPY ANNIVERSARY!

That's right folks, today marks 1 year of Edmonton's NewBees! It's been so much fun teaching and talking to all my friends about beekeeping here in Edmonton, and everyone is so supportive and inquisitive.

Things have been busy and things have been dormant, like bees during winter, but there always seems to be new things to share. Thanks for sticking it out during those long winter months without any posts. Here's hoping for another year of great beekeeping info.

In celebration of this milestone, I've gone out and picked up a new URL for the site. You can now access the site by using www.newbees.ca If they ever make beekeeping legal in Edmonton this will eventually be transformed into a urban beekeeping website so that everyone who needs info or courses can find that information!

June 7, 2011

Apologies and Top Bars

Hey Everyone,

I'd like to start off this post with a sincere apology to those readers who contacted me via newbees@telus.net. I honestly forgot about this account as I had only received a few emails from friends and a tonne of spam. While puttering around today I remembered to check it and had half a dozen emails from readers dating back to January. I will be more vigilant in checking in the future!

Now onto the good stuff. Top Bars! I know you are all thinking, "Finally! He's been muttering and carrying on about these for months." Yes, I have and now have the tale of 2 top bar hives.

The first tale is one you are already familiar with. My friend Beatrice and I have been building a set of top bar hives together starting back in April. I decided to spare everyone a giant photo montage of the building process as there are hundreds already out there on the web. I thought I'd focus more on the nuances and differences between Langstroth hives in future posts. As for the building process, it took Beatrice an I about a week and a half to build our hives. We didn't quite have a great woodworking shop and were using whatever tools we could find, we did eventually get the job done though. Beatrice's package arrived May 4th at Bee Maid, and we headed out with her hive and everything else we needed to hive the package. The bees came in a cardboard tube with plastic ventilation caps, which is different then the screened box you see in most YouTube videos. I do think this makes for a much easier installation process.
If you have children, be sure to save it. Its heavy duty construction would make it the Excalibur of any cardboard tube sword fight.

We arrived at the acreage, within the city limits, and got the top bar hive setup. Once we have everything arranged properly we unleashed the bees. This process was extremely simple. First, using a spray bottle filled with a 1:1 sugar syrup you give the bees a good spray down on the end of the tube you are going to open. This will limit the amount of bees that will fly once you pop the top. After they are sufficiently covered in sugar water, you remove the staples holding the plastic cap using a screw driver. You want to do this at the end that has the green mesh hanging out, because this is what the queen cage is attached to. Then, making sure you have a hold of the green mesh, you give the tube a sharp tap on the ground to get all the bees at the bottom, remove the cap and slowly pull out the queen cage. Once you have taken that out and have placed it on the hive, you can turn the tube upside down over the hive and give it a good shake. All of the bees will come out as a clump and then you can lay the tube with the open end facing the hive in front of the hive, any bees that are still inside will find their new home eventually. The last step is to remove the cork from the queen cage and hang it from the middle top bar. If there is no candy in the queen cage, you can easily make up a soft fondant using icing sugar and water, or if you don't want to do that you can come back 2-3 days later and release her manually.

Overall it was a super easy process and the bees loved their new home. Beatrice's most recent inspection last week has shown that the bees have already drawn out 6 full bars of comb and are still building. As a side note, you will always want to provide a feeder for bees coming out of a package. They don't have any food stores and if the weather is lousy or there is a lack of forage they will need it to start building some comb.
Such a nice colour!

The queen cage is suspended in the middle, the happy bees below are fanning pheromones letting the other bees know to come on in.

The second tale I have is about my nuc that I had ordered from Eliese down at ABC in Calgary, however there's a twist! Come back in the next few days and you'll hear about my adventures down in Calgary.

May 30, 2011

Queen of the Sun


In case you didn't know yesterday, May 29th, was the day of the honey bee. A nation wide lobby is pushing to get this day recognized in as many provinces and municipalities as possible, and so far they are doing a pretty good job. As part of the celebrations Metro Cinema, in partnership with Lola Canola Honey, brought the documentary "Queen of the Sun" to Edmonton. Yesterday was the first screening, but there are 4 more. 7pm and 9pm, on May 30th and 31st. I would highly recommend that anyone with any level of interest in honey bees, or the plight of the honey bee go see this movie.

As for my personal thoughts on the movie, it did a very good job of touching base on all the things a person, who knows nothing about bees, should know about honey bees. It interviews a wide range of people from all over the world who are directly, or indirectly, affected by Colony Collapse Disorder. Noting that I am not, or never will be, a film critic I did find some of the cinematography off. There were also a few sections and cuts that seemed to be a bit out of place or off topic, but generally the flow of the movie was OK. The only other criticism I would have, and this may differ depending on who you talk to, was that most of the people they had tended to skew more to the Hippie side of things, for lack of a better word. Yes, I acknowledge that because of how honey bees are so closely intertwined with the very essence of nature there will be more than a few hippies, tree huggers, and environmentalists preaching the virtues of the bees. However, with the exception of one bloke in London most of the urban beekeepers came off on the extreme end of the scale, and even he was a bit eccentric but then again you do have to be a bit eccentric to become a beekeeper.

I was hoping to see more about the average person who falls in love with the bees once they are exposed to a hive for the first time. A teacher, a lawyer, or a child; people who don't necessarily practice yoga and eat only whole grains and vegetables. A powerful message that screams out that bees aren't dangerous and if you just stopped for a minute, allowing your childhood fear to melt away into the peaceful humming of an busy apiary on warm summer's day, you too could fall in love with these insects.

SO GO! See for yourself and find that love! There are 4 more screenings. Check out these links for more info. It is being shown downtown at the Citadel Theaters in Ziedler Hall.

METRO CINEMA

LOLA CANOLA HONEY

May 26, 2011

The Andrenids are amoung us!

Two weeks ago my wife and I were outside getting our vegetable garden prepped and seeded. While I was puttering around I noticed what I thought to be a few honey bees buzzing around. However, their behavior was very odd. They were slowly flying around the ground, occasionally landing to walk around a bit before taking off again. I began watching intently as my curiosity peaked. Laying on my stomach I followed the progress of one of these insects, as I landed in front of me I noticed that it was very close in appearance to a honey bee. The differences were subtle, while the head looked like a honey bee and it still had a fuzzy thorax, the hair was reddish yellow in colour, the abdomen was shiny jet black and smooth much like a fly. Another thing I noticed was that they were almost silent during flight, many times flying over my head without a sound. After a few minutes of observation, I noticed that one of the bees had permanently landed and was starting digging a hole into the dirt. Most curious. I ran inside to get my google on.

My instincts were right! It was a solitary species of bee native to Alberta. The Andrenid Bee, also known as "mining bees". These bees will dig a nest so they can lay an egg. They will then forage for pollen which they can stock up around the egg. Once there is enough food for the egg, the female will seal up the entrance and leave. While considered a solitary species, usually there will be many nests in close proximity giving the appearance of a colony.

This leaves me in a bit of a dilemma because the bees have setup home in the clay I placed around my house last year to grade. I had planned on compacting it and laying some topsoil and sod...can I do that now? Decisions, decisions.

Here are some pictures of the nests and bees. They took me a while to get and I bet my neighbours thought I was a bit nuts crawling around my front yard military style with camera in hand.


One of many burrows.


Bee inside a burrow, if you look closely you can see her face.


Posing for her close up.

May 18, 2011

Lazy Days

Hey Folks,

Just a quick update to let everyone know that I will be posting a few posts in the coming days. I've been a bit lazy in getting pictures off my camera and have lots to show everyone.

Everything from the new Top Bar hives that my friend and I have built and more recently installed a package of bees into, to my new local friends the Andrenid bees.

Be sure to check back soon.

April 11, 2011

Spring has arrived!

Hey everyone,

I've been meaning to post on how my installation of the candy board went last week, but I got busy with preparations for my Top bar hive building adventure. I'll squeeze it in with today's post.

So spring has finally arrived here in Edmonton. We've had almost 2 weeks of above zero highs and the majority of snow has melted away leaving brown/green spots of grass. Before that happened though, I went out to the bee yard to put my candy board on the hive so the girls have something to eat until local plants start to bloom. Everything went well, but I was surprised by the size of the cluster. I was expecting only a small corner or a quarter of the top to be bees, when I opened the cover they covered half of the frames. This created a bit of an issue because I now had to herd the bees around in order to place the candy board on top of the frames. I solved this by breaking the board up into smaller pieces. Next year, I will just forgo this issue by pouring the candy directly into a spare cover that way I can just replace the covers and be done.

Herding bees as I add pieces of candy board.

I headed out today to ensure that my hive wasn't bogged down in a lagoon of melting snow. Mario had expressed some concerns about his hives, but I think mine will do fine because I have them on cinder blocks. As expected, Mario's acreage was very soupy and I might actually have to purchase a pair of rubber boots for my next visit. A balmy 14°C meant a flurry of activity at the entrances of the hives, and the past 2 weeks of warm weather had melted all of the snow from around my hive providing easy access. With the easy access, I decided to unwrap the hives and do a little spring cleaning. Mario had an extra pollen patty as well, so I quickly popped the cover off to put it on top of the frames. The pollen patty will help the colony to start raising brood until they can start gathering larger quantities from blooming flowers. I was happy to see that the bees had been feasting on the candy I had added a week or so before.

Pollen patty, right side, and remnants of the candy board.

Once the hive was unwrapped I removed the entrance reducer and with a hooked piece of metal began fishing around the lower entrance. I was surprised by the amount of debris and dead bees that kept coming out with each swipe. I took a solid 15 minutes of scraping until the hook came out clean. The giant pile of corpses was quite a depressing sight, however it highlights the stark reality that beehives face during winter. So many bees give up their lives so the colony can survive and continue their genetic line.

Mounds of dead bees form a mass grave in front of the hive.

With my spring cleaning done, its back to playing the waiting game. When the weather gets even warmer I will be able to do a proper inspection to ensure everything is peachy keen. Until then, I sit and cheer on the dandelions....and maybe build a top bar hive or two.

BEFORE.

AFTER.

March 23, 2011

Mmmmmm Candy

Looks like old man Winter isn't quite going to give up so easy this spring. While temperatures are still fairly mild, it looks like there will be on and off flurries for the next week or so. It won't really get nice until early April. The bees have been stuck in their boxes for nearly 6 months now and food will be running low. On the bright side, it has been warm enough for them to break cluster and move around the hive to get at all their stored honey.

To help prevent starvation issues there are a few things a beekeeper can do. The most obvious is to provide a liquid form of food, either honey or sugar syrup. People that live in southern regions wouldn't have issues with this, but up here in the cold temperatures that syrup will quickly turn into a solid block of ice. Us northerners need a dry option that won't be so hard to access for the bees.

The Mountain Camp method is a simple and basic way to do this. With this method you add an empty super on top of the hive, place a piece of newspaper over cluster and then pour dry sugar on top. The newspaper acts as a barrier preventing the sugar from flowing freely down into the hive. The bees will then chew small sections away from the newspaper and feed off the sugar. The sugar also acts as a moisture absorbant preventing any condensation from dripping back onto the bees.

A slightly more complex method is to cook up some candy boards. To make candy boards, you take 2 cups of water and 5 pounds of sugar and cook them to approximately 240°F. After it cools it will result in a hard board that is much easier to work with than loose sugar. You can also add vinegar/acid to the process which will invert the sugars into glucose and fructose which is easier for the bees to digest. These boards also have the moisture absorption properties of the mountain camp method, but have the added benefit of being easier to remove once the bees start gathering their own nectar. Here is a quick run down of my candy making experience.


Materials Required. 2.5 lbs of sugar, 1 cup of water, candy thermometer, electric mixer, pot, and pan with parchment paper. (essential oils optional)


Add everything to pot on high heat. If you want to invert the sugar, add 1 Tbsp of lemon juice or cider/white vinegar.


Bring to boil at 240°F, the temperature will plateau at certain points like 230°F but given time it will slowly start to rise again.


Once 240°F is reached, remove from heat and let cool to around 200°F. Using the hand mixer, beat the mixture briefly every 2 or 3 minutes. Once the mixture starts to crystallize and is a smooth white semi liquid paste, pour into the sheet pan and let harden.

March 15, 2011

The Bee Dr. Is In

Good Almost-spring day to everyone!

I hope everyone is having an enjoyable end of winter. It's finally looking like there is light at the end of the tunnel here in Edmonton. We just made it past a nasty cold snap at the start of March and things are looking warmer for the next week or so. Hopefully it will melt all this snow we have, the snow is making things feel more depressing despite how much has already melted away


I was a tad concerned about the recent cold snap so when it was nice and warm yesterday, about 2°C, I went to ensure the girls were still alright. To my pleasure things looked great. They was a lot of activity at the top entrance as everyone was out enjoying the sun. I took this opportunity to test out a method of checking on hives during cold weather, despite being obvious from the activity they were doing extremely well. The method is meant more for checking during colder weather when there is no sign of activity at all. My nurse friend was kind enough to snag me a spare stethoscope. The premise is simple, using the stethoscope you listen for the gentle hum of the cluster. With my curiosity peaked, I tested it out yesterday. The hum was extremely loud due to all the activity but the method seemed to work well regardless of all the extra wrapping Mario had added to the hive. If it does get really cold again, I'll have to go test it out then to see if I can hear anything when the bees are clustered more tightly.

I also took the opportunity to find my smoker yesterday. I was searching all over my garage without a trace and then I remember I use to store it beneath the wood pile next to my hive at the bee yard, I must have left it there. If such was the case, I would have to remove it before the snow started to melt causing it to rust. The only thing that lay between it and myself was a waist high snow bank......


Let this be a lesson to always keep your smoker in a safe and dry place, although it did bring back fond memories of building snow forts as a kid.


The speckled landscape of bee poop....lots and lots of bee poop.


Girls gotta stick together as my wife helps out a stranded bee.

This week I'll be making some candy boards to put on top of the hive in the next week or so. Food stores will be getting towards the low end and the bees will need something to feed on until the snow melts and the dandelions bloom. Check back soon for pics and instructions on how to get that done.

I'd also like to thank my wife for another great artistic picture of me in the bee yard. Check it out on the main page, it will be a great alternate "About Me" picture during the winter months.

February 17, 2011

Warming Winter Days

Hey Folks,

So the weather has been quite variable as of late, swinging from 5°C to -20°C in a matter of days. However, a week of above zero temperatures was a great excuse to go out and see the bees. Hopefully some of the drifts had melted away allowing easy access to the hives.

When we arrived we noticed that Mario had managed to get his tractor out to the bee yard, making the trek so much easier. I was concerned to see that the city had already begun moving and grading dirt onto Mario's land. Mario's acreage is quickly being encroached on by developers and they approached him with a proposal to put all the top soil removed from their sites onto his land. At first I was concerned, but Mario said they are going to grade it properly and then in spring it will be covered in Alfalfa by the farmer who he leases the land to. It's a win win for Mario and the bees.


The hive was buzzing with activity in the warm sunny day. The bees were obviously happy to get out and stretch their wings, not to mention use the washroom. Most people don't know that bees will not defecate in the hive, so they can only relieve themselves when the weather permits. This was blatantly apparent with all the patches of yellow spots that littered the snow drifts in front of the hive. A good note for any urban beekeepers is to make note of which way your hive is aimed as I hear bee poop isn't the easiest of things to clean off, say, a car or patio furniture.

Unfortunately, on a sadder note, the good weather also means that newer born bees will also take the opportunity to get out of the hive. Without the proper flight skills they often end up landing on the snow which will slowly, if not surely, kill them. I was touched to see that when Mario came out to greet us, he took time to pick up some of these nurse bees and attempt to sheppard them into a hive. An extremely touching gesture akin to those baby duck videos that litter YouTube. If there is anything that can swing a person's mind as to the "voraciousness" of bees, it would seeing 2 grown men herding baby bees back home.

A nurse bee soaking up the rays on my finger, she did eventually take flight.

I had intended to remove the entrance reducer and using a bent coat hanger clear out the bottom of the hive of dead bees, however Mario had so thoroughly wrapped my hive it would have been very difficult to get it off. Also, there was much more activity than I was expecting and with the snow drifts around the hive there was no easy way to gain access without sticking my head right next to the top entrance. Without a veil that situation could be precarious. It appeared that the bees were doing a good job of cleaning the hive themselves though as all around the hive lay the bodies of fellow bees, it is quite astonishing how many bees die during the cold winter months.

We are starting to get into the spring prep months so check back soon for new posts on the activities I will be doing. These include building a top bar hive, making spring feed, and possibly even making my own pollen patties. Until next time, bee cool.

January 11, 2011

Calling All Newbees!

Hey Beekeepers!

It's that time of year again when beekeepers start making preparations for the new season. It's actually a pretty hard thing to consider especially since we just got a dump of snow here in Edmonton and apparently there's more on the way.

I was trying to scheme with Patty and Eliese about setting up a Urban beekeeping course this spring, but both are fairly busy and I'm not really sure if there's time to effectively set one up. I know Eliese's courses in Calgary have been selling out like hotcakes, but she has the added advantage of beekeeping being legal within the city down there. I'm not entirely sure how many people I could round up for a course in Edmonton.

That said, I've been speaking with Jane regarding her acreage within the city and she's still excited and willing to allow some hives out there. I've emailed all my old classmates from Patty's class last year to see if people are interested in getting starting this. I've received a few responses which is great! I will also be holding a woodworking shop with Patty to build some Top Bar Hives for these new beekeepers.

If you live in the Edmonton, or surrounding area, and would be interested in getting started into beekeeping let me know! If you don't have understanding neighbours or just don't want to risk it, there is plenty of room on Jane's land. Just shoot me an email at newbeestelus.net and I'll get back to you with any information you might need!

January 3, 2011

New Year's Checkup

Happy New Year Beekeepers!

I hope that everyone had a fantastic Christmas and a happy new year. My wife and I had a great holiday and with the cold weather breaking for a brief period I headed out to see how my bees have been coping with the bitter cold -25 days we've been having lately.

The drive out to the acreage wasn't nearly as bad as I thought it might be. I assume this is because they roads we travelled on are all technically within city limits and are therefore plowed eventually despite being low volume. Another possibility is that because of all the housing construction out there the large vehicles have made short work of the snow.

We arrived to find Mario in his tractor plowing his driveway, one of the disadvantages of having an acreage is the long driveway you have to shovel in winter. As always we had a brief chat with Mario about how things have been. Fortunately for us Mario had attempted to plow a path out to the hives, but after almost getting stuck gave up the venture. Even though it wasn't complete it saved us from having to trek through some ugly drifts.


We arrived to a very quite and solemn looking hive. Mario had kindly placed a snow fence in the treeline behind the hive so the snow drifts weren't that bad near the hive. He had also placed a burlap skirt around the bottom of the hive to keep snow from getting under the hive. He was worried about the airspace below my hive because of the cinder blocks I am using as a hive stand. I indulged Mario as I have never really worried about it because everything I've read says it's not the cold temperature that will kill your bees but moisture, hunger, or disease. If anything the snow below the hive would act as an insulation anyways.


It took some effort to get closer to the hive as the snow was knee deep. As I neared the hive I noticed that the specks in the snow at the front of the hive weren't the tree debris I had initially thought them to be, they were dead bees.


Yesterday we had some really warm weather so my first assessment would be that the hive was active and doing some house cleaning, getting rid of the bees that have given their life in service to the hive. Another possibility would be that something or someone had come by and given the hive a good enough knock to send out a defensive force, but seeing as there weren't any type of visible tracks near the hive I ruled this out. I am taking these dead bees as a sign that the hive is in exceptional health as they are still performing hive duties when the weather permits. Another positive sign is that the plastic covering the top entrance had some condensation on it meaning that there is still warm moist air coming out.

I briefly cleaned the lower entrance as some ice and snow had built up blocking any sort of ventilation. I have read that you can increase ventilation by using a grill type entrance device instead of a solid piece of wood. As I'm not sure if this is just for warmer climates I'll do more research on the subject and let you know what I find.

Until my next post, stay warm and stick to those resolutions!